
JRuby Scripting
This add-on provides Ruby scripting language for automation rules. It includes the openhab-scripting helper library, a comprehensive Ruby gem designed to enhance automation in openHAB. This library offers a streamlined syntax for writing file-based and UI-based rules, making it easier and more intuitive than Rules DSL, while delivering the full features of the Ruby language.
If you're new to Ruby, you may want to check out Ruby Basics.
Example file-based rules:
rule "Turn on light when sensor changed to open" do
  changed Door_Sensor # a Contact item
  run do |event|
    if event.open?
      Cupboard_Light.on for: 3.minutes # Automatically turn it off after 3 minutes
    else
      Cupboard_Light.off # This will automatically cancel the timer set above
    end
  end
end
rule "Door open reminder" do
  changed Doors.members, to: OPEN
  run do |event|
    # Create a timer using the triggering item as the timer id
    # If a timer with the given id already exists, it will be rescheduled
    after 5.minutes, id: event.item do |timer|
      next if timer.cancelled? || event.item.closed?

      Voice.say "The #{event.item} is open"

      timer.reschedule # Use the original duration by default
    end
  end
end
Example UI-based rules:
only_every(2.minutes) do # apply rate-limiting
  Audio.play_sound("doorbell.mp3")
  Notification.send("Someone pressed the doorbell")
end
Additional example rules are available, as well as examples of conversions from Rules DSL, JavaScript, and Python rules.
- Why Ruby?
- Installation
- Configuration
- Usage
- Library Details
- File Based Rules
- Console Commands
- Calling Java From JRuby
- Full Documentation
Why Ruby?
- Ruby is designed for programmers' productivity with the idea that programming should be fun for programmers.
- Ruby emphasizes the necessity for software to be understood by humans first and computers second.
- Ruby makes writing automation enjoyable with its readable syntax and a rich collection of useful methods in its built-in classes.
- Rich ecosystem of tools and libraries, including things like Rubocop to help developers write clean code and RSpec to test the libraries.
- Ruby is really good at letting one express intent and create a DSL to make that expression easier.
Design points
- Create an intuitive method of defining rules and automation
- Rule language should "flow" in a way that you can read the rules out loud
- Abstract away complexities of openHAB
- Enable all the power of Ruby and openHAB
- Create a Frictionless experience for building automation
- The common, yet tricky tasks are abstracted and made easy, e.g. creating a timer that automatically reschedules itself.
- Tested
- Designed and tested using Test-Driven Development with RSpec
- Extensible.
- Anyone should be able to customize and add/remove core language features
- Easy access to the Ruby ecosystem in rules through Ruby Gems.
Installation
From the User Interface
- Go to
Settings -> Add-ons -> Automationand install the jrubyscripting automation addon following the openHAB instructions.
Using Files
- Edit
<OPENHAB_CONF>/services/addons.cfgand ensure thatjrubyscriptingis included in an uncommentedautomation=list of automations to install.
Configuration
After installing this add-on, you will find configuration options in the openHAB portal under Settings -> Add-on Settings -> JRuby Scripting.
Alternatively, JRuby configuration parameters may be set by creating a jruby.cfg file in conf/services/.
By default this add-on includes the openhab-scripting Ruby gem and automatically requires it.
This allows the use of items, rules, shared_cache and other objects in your scripts.
This functionality can be disabled for users who prefer to manage their own gems and requires via the add-on configuration options.
Simply change the gems and require configuration settings.
| Parameter | Description |
|---|---|
gem_home |
The path to store Ruby Gems. Default: $OPENHAB_CONF/automation/ruby/.gem/{RUBY_ENGINE_VERSION} |
gems |
A list of gems to install. Default: openhab-scripting=~>5.0 |
bundle_gemfile |
The path to your Gemfile relative to $OPENHAB_CONF/automation/ruby. Default: Gemfile |
check_update |
Check for updated version of gems on start up or settings change. Default: true |
require |
List of scripts to be required automatically. Default: openhab/dsl |
rubylib |
Search path for user libraries. Default: $OPENHAB_CONF/automation/ruby/lib |
dependency_tracking |
Enable dependency tracking. Default: true |
local_context |
See notes below. Default: singlethread |
local_variables |
See notes below. Default: transient |
console |
The default script used by jrubyscripting console Karaf console command. Default: irb |
When using file-based configuration, these parameters must be prefixed with org.openhab.automation.jrubyscripting:, for example:
org.openhab.automation.jrubyscripting:gems=openhab-scripting=~>5.0
org.openhab.automation.jrubyscripting:require=openhab/dsl
gem_home
Path to where Ruby Gems will be installed to and loaded from.
The directory will be created if necessary.
You can use {RUBY_ENGINE_VERSION}, {RUBY_ENGINE} and/or {RUBY_VERSION} replacements in this value to automatically point to a new directory when the addon is updated with a new version of JRuby.
gems
A comma separated list of Ruby Gems to install.
The default installs the version of the helper for this version of openHAB.
When overriding the default, be sure to still include the openhab-scripting gem in the list of gems to install.
Each gem can have version specifiers which uses pessimistic versioning. Multiple version specifiers can be added by separating them with a semicolon.
Examples:
| gem setting | Description |
|---|---|
openhab-scripting |
install the latest version of openhab-scripting gem |
openhab-scripting=~>5.0.0 |
install the latest version 5.0.x but not 5.1.x |
openhab-scripting=~>5.0 |
install the latest version 5.x but not 6.x. This is the default/recommended setting. |
openhab-scripting=~>5.0, faraday=~>2.7;>=2.7.4 |
install openhab-scripting gem version 5.x and faraday gem version 2.7.4 or higher, but less than 3.0 |
gem1= >= 2.2.1; <= 2.2.5 |
install gem1 gem version 2.2.1 or above, but less than or equal to version 2.2.5 |
bundle_gemfile
A path to your Gemfile, including the file name.
It can be an absolute path, or just the file-name portion, in which case it will be resolved to $OPENHAB_CONF/automation/ruby.
The default is Gemfile.
If the Gemfile doesn't exist, the gems setting will take effect, and bundler will not be used.
The bundler init console command can be used to create a new Gemfile, or you can create it manually. When this Gemfile exists, the gems setting will be ignored, and only the gems specified in your Gemfile will be installed and used.
Note that by default, the gems listed in the Gemfile will also be required, so it's not necessary to require them again in the require setting.
To disable this behavior for a specific gem, add a require: false argument to the gem command within the Gemfile.
check_update
Check RubyGems for updates to the above gems when openHAB starts or JRuby settings are changed. Otherwise it will try to fulfil the requirements with locally installed gems, and you can manage them yourself with an external Ruby by setting the same GEM_HOME.
This setting equally applies whether you're using bundler with Gemfile or the gems way of installing Ruby gems.
require
A comma separated list of script names to be required by the JRuby Scripting Engine at the beginning of user scripts. The default is to require the helper library.
rubylib
Search path for user libraries. Separate each path with a colon (semicolon in Windows).
dependency_tracking
Dependency tracking allows your scripts to automatically reload when one of its dependencies is updated. You may want to disable dependency tracking if you plan on editing or updating a shared library, but don't want all your scripts to reload until you can test it.
local_context
The local context holds Ruby runtime, name-value pairs for sharing variables between Java and Ruby.
Valid values are: singleton, threadsafe, singlethread, or concurrent.
See this for options and details.
local_variables
Defines how variables are shared between Ruby and Java.
Valid values are: transient, persistent, or global.
See the JRuby documentation for options and details.
Usage
UI Based Scripts
The quickest way to add rules is through the openHAB Web UI.
Advanced users, or users migrating scripts from existing systems may want to use File Based Scripts for managing rules using files in the user configuration directory.
Adding Triggers
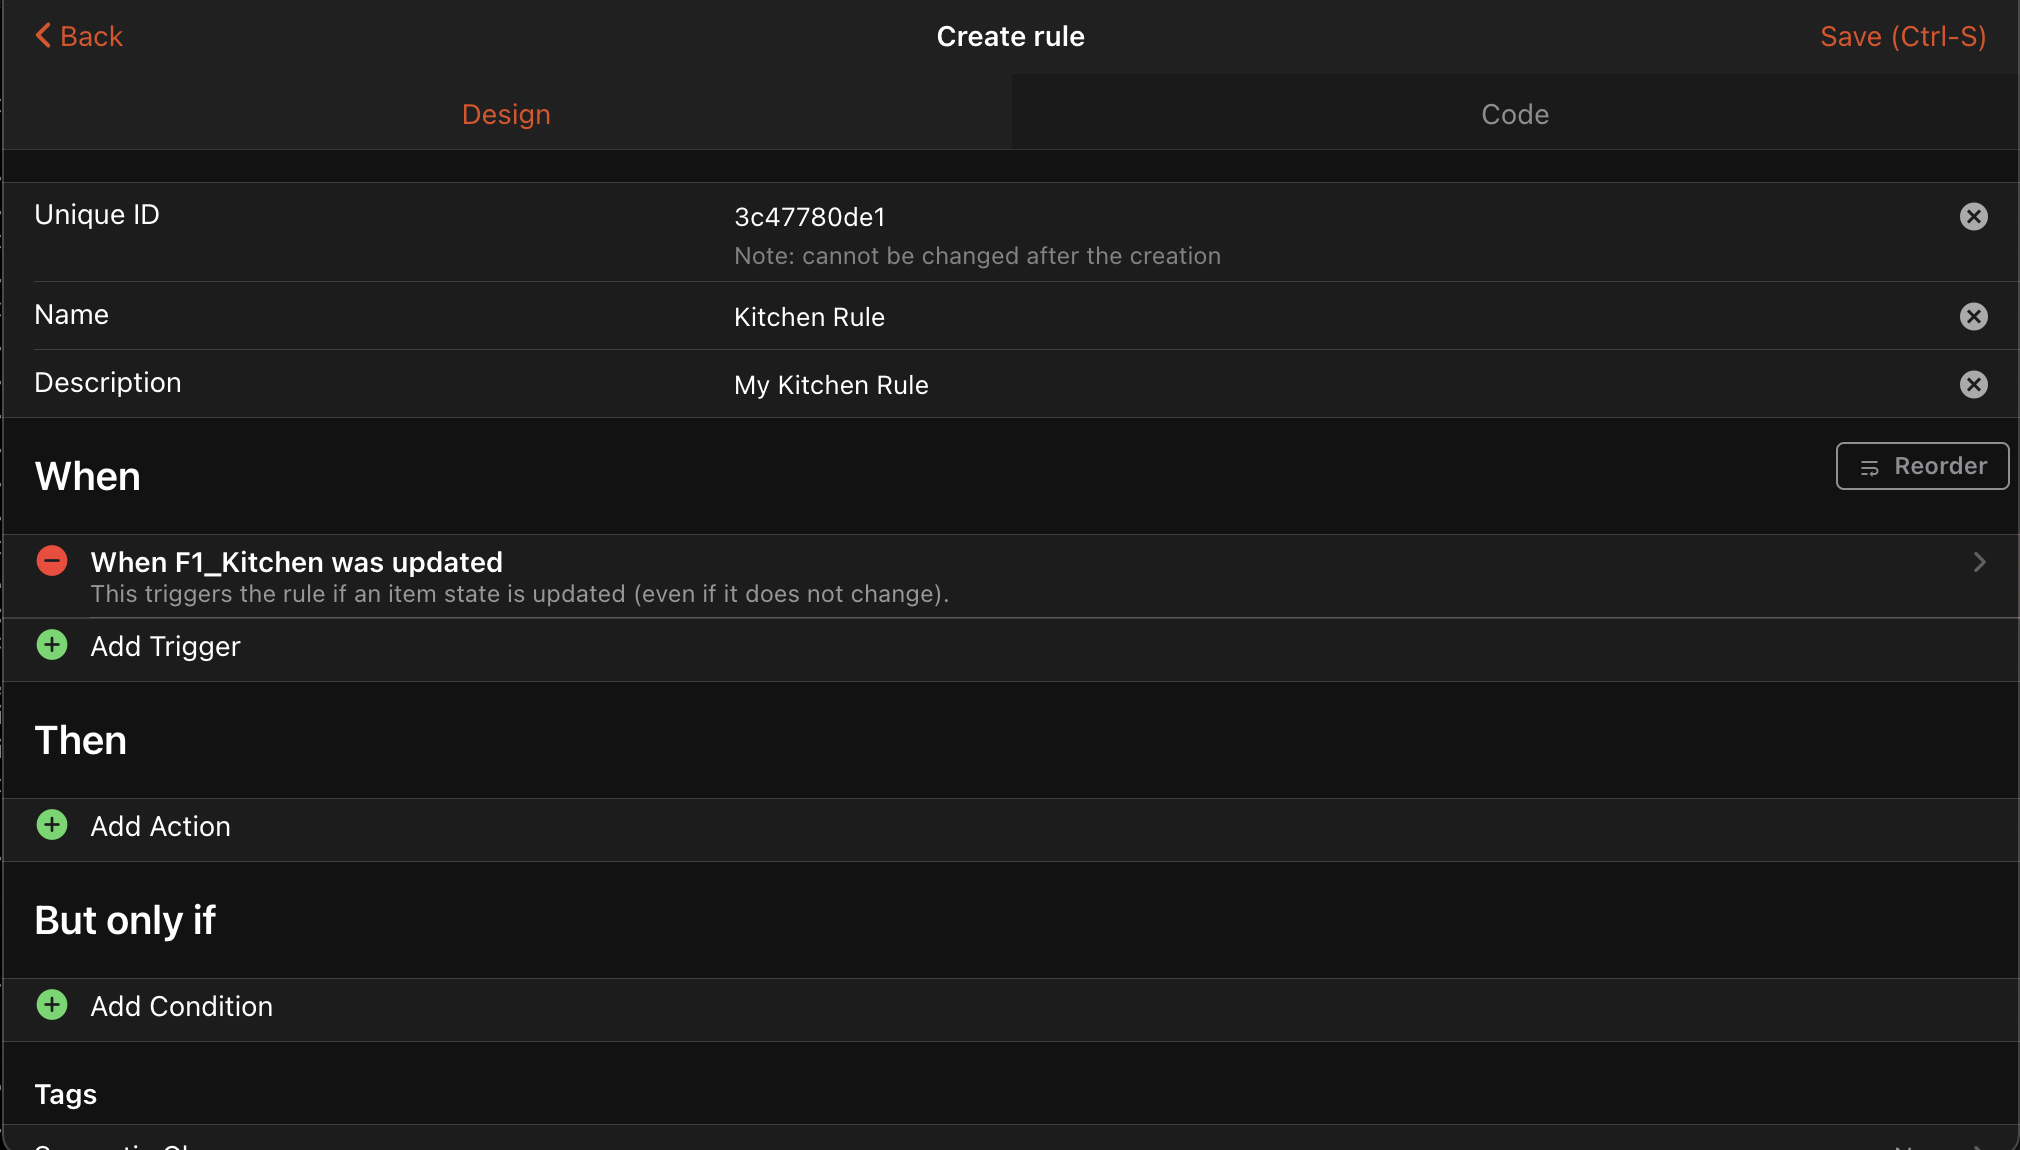
Using the openHAB UI, first create a new rule and set a trigger condition.
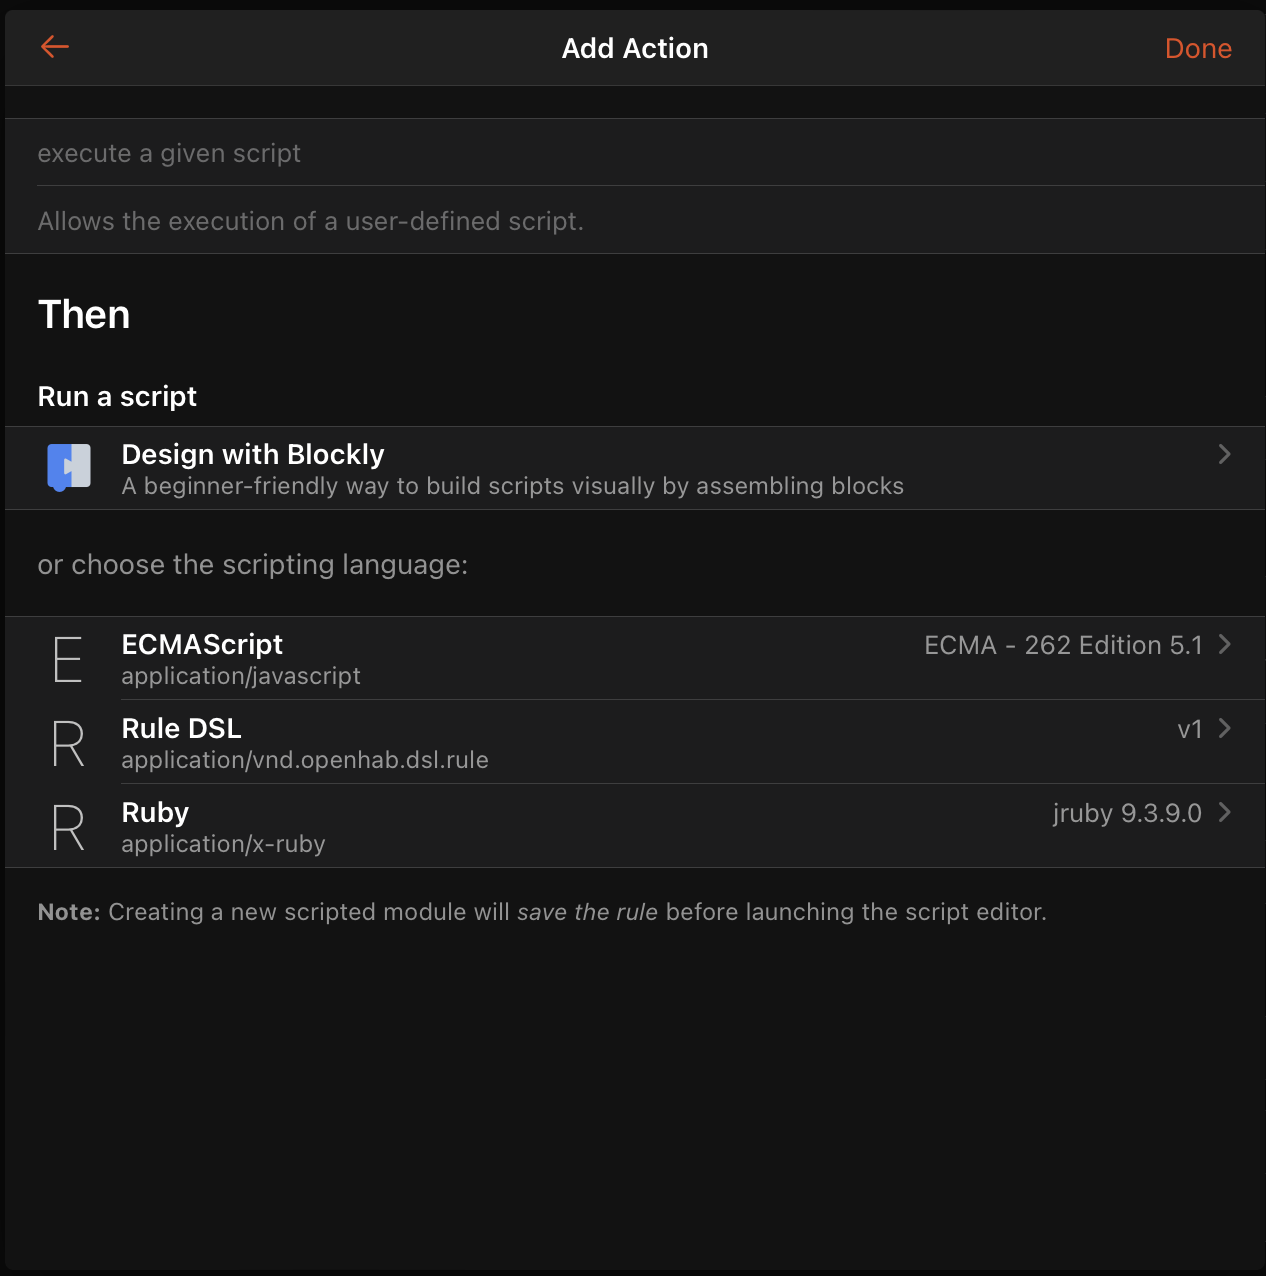
Adding Actions
Select "Add Action" and then select "Run Script" with "Ruby". This will bring up an empty script editor where you can enter your JavaScript.
You can now write rules using standard Ruby along with the included openHAB library.
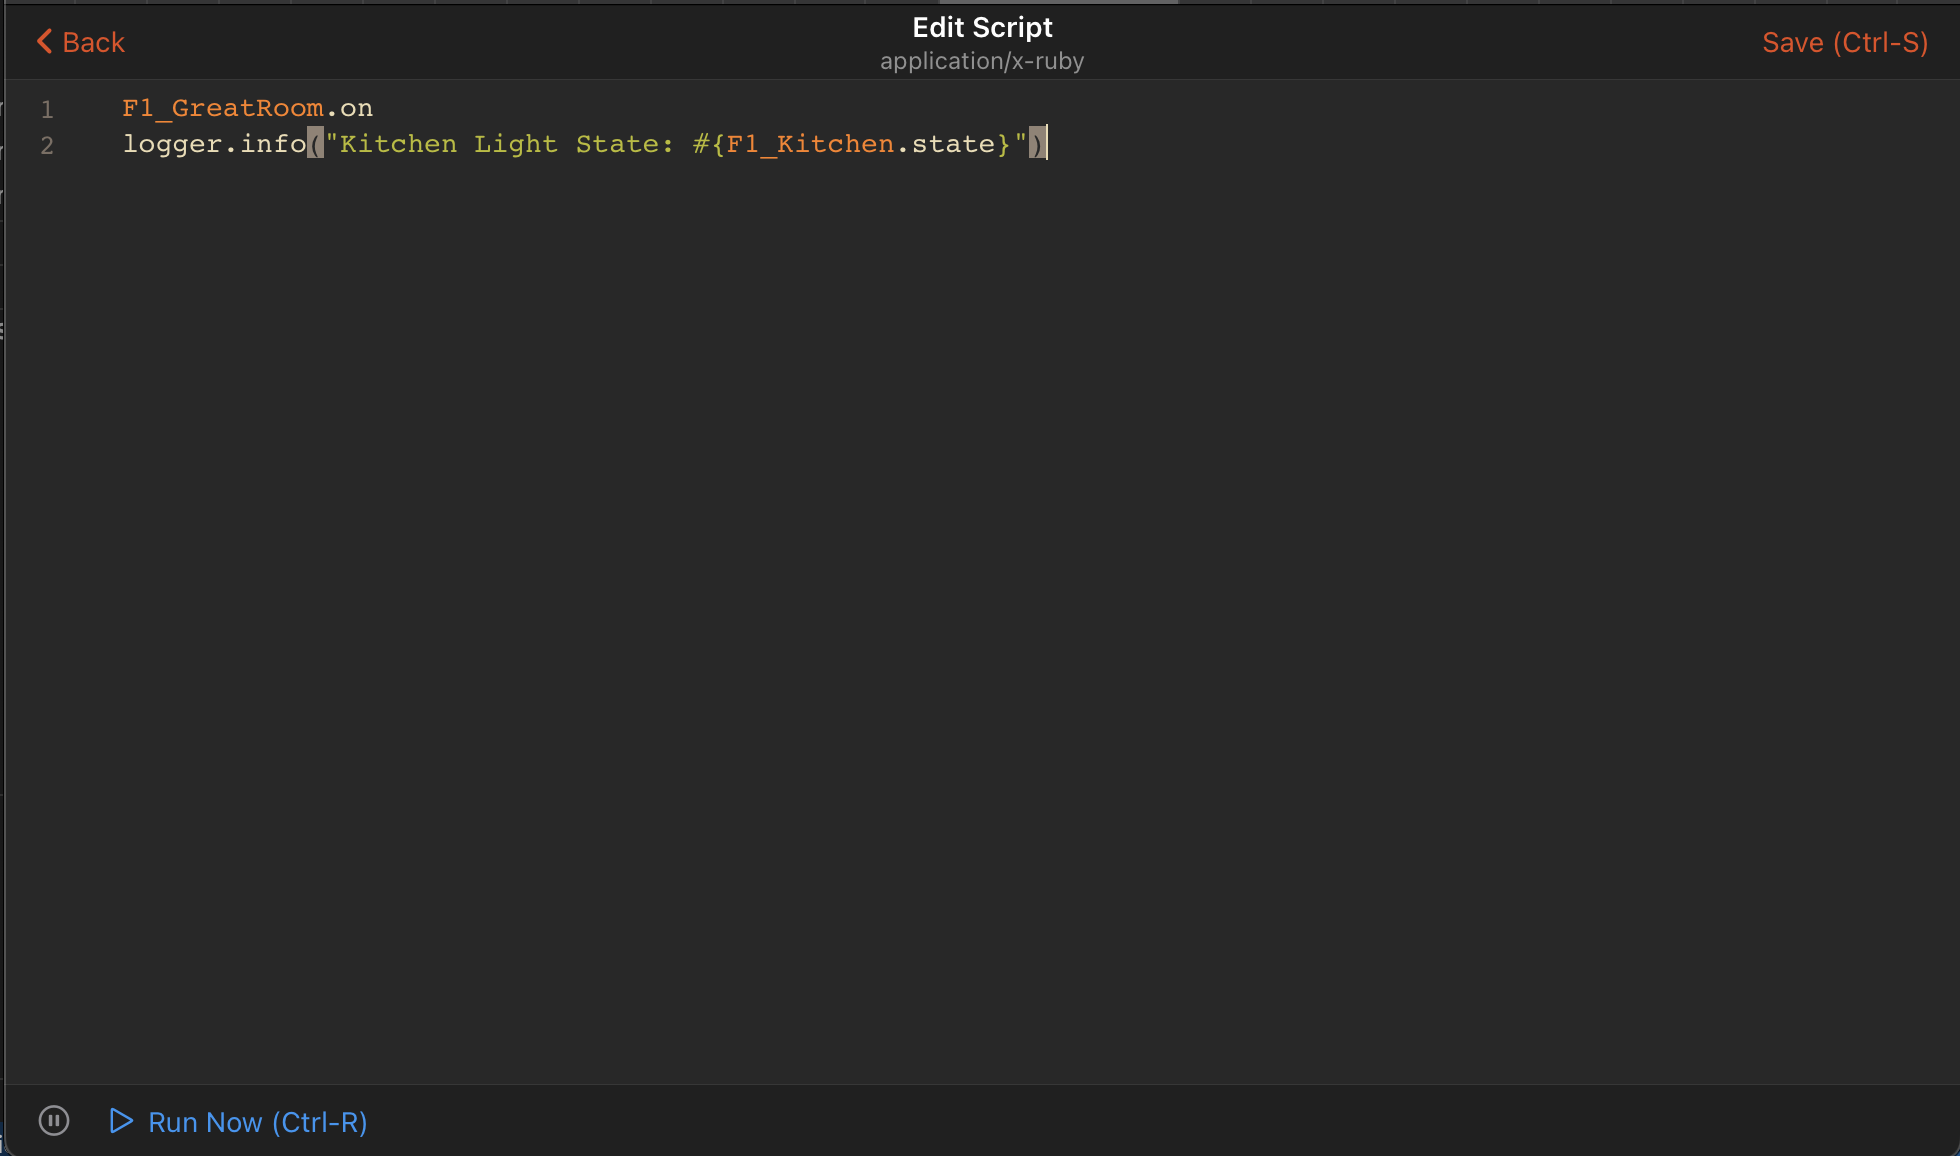
For example, turning a light on:
KitchenLight.on
logger.info("Kitchen Light State: #{KitchenLight.state}")
Sending a notification:
Notification.send("romeo@montague.org", "Balcony door is open")
Querying the status of a thing:
logger.info("Thing status: #{things["zwave:serial_zstick:512"].status}")"
Theoretically you could even use a system start trigger with a UI rule, and then use the syntax mostly developed for file based rules to create multiple rules.
File Based Scripts
The JRuby Scripting addon will load Ruby script files with .rb extension from automation/ruby in the user configuration directory.
The system will automatically reload scripts when changes to files are detected.
Local variable state is not persisted among reloads, see using the cache for a convenient way to persist objects.
See File Based Rules for examples of creating rules within your scripts.
Event Object
When you use "Item event" as trigger (i.e. "[item] received a command", "[item] was updated", "[item] changed"), there is additional context available for the action in a variable called event.
This tables gives an overview of the event object for most common trigger types.
For full details, explore OpenHAB::Core::Events.
| Property Name | Type | Trigger Types | Description | Rules DSL Equivalent |
|---|---|---|---|---|
state |
State or nil |
[item] changed, [item] was updated |
State that triggered event | triggeringItem.state |
was |
State or nil |
[item] changed |
Previous state of Item or Group that triggered event | previousState |
command |
Command | [item] received a command |
Command that triggered event | receivedCommand |
item |
Item | All item related triggers | Item that triggered event | triggeringItem |
group |
GroupItem | Member of [group] changed, Member of [group] was updated, Member of [group] received a command |
Group whose member triggered the event | triggeringGroup |
logger.info(event.state == ON)
event.item
Get the Triggering Item's Name:
event.item.name
Get the Triggering Item's Label:
event.item.label
Get the Triggering Item's State:
event.state # this version retrieves the item's state when the event was generated
or
event.item.state # this version will re-query the item for its state
if event.item.state == ON
  # do something
end
# or (preferable)
if event.item.on?
  # do something
end
Get the Triggering Item's Previous State:
event.was
if event.was.on?
  # do something
end
Compare Triggering Item's State Against Previous State:
event.state > event.was
Get the Received Command:
event.command
if event.command.on?
  # do something
end
Library Details
The openHAB JRuby Scripting runtime attempts to provide a familiar environment to Ruby developers.
Items
The items object allows interactions with openHAB items. However, most items can be referred to directly by name:
My_Item
gWindowBlinds
Items can be retrieved dynamically:
the_item = items['My_Item'] # This returns an Item object, not just its state
# For all intents and purposes, the_item variable is the same as My_Item in the previous example
Get the Item's Name as a String:
My_Item.name
Get the Item's Label:
My_Item.label
Get a Related Item:
my_light_item = items[My_Switch.name.sub('_Switch', '_Light')]
Groups
Groups are regular items, but can also contain other items.
# direct members
gTest.members

# direct members and all their descendents
gTest.all_members
Group members work like a Ruby array
so you can use & for intersection, | for union, and - for difference.
curtains_in_family_room = gFamilyRoom.members & gCurtains.members
You can iterate over group members with Ruby's ubiquitous #each method:
gTest.members.each do |item|
  # process item
end

# Iterate over all members, including members of members
gTest.all_members.each do |item|
  # process item
end
Group members are also Enumerable, so can use any of tthose included methods:
members_that_are_on = gTest.members.select(&:on?)

# exclude state
members_that_are_not_on = gTest.members.reject(&:on?)

# Filter with code:
high_temperatures = gTemperatures.members.select(&:state?).select { |item| item.state > 30 | '°C' }
See also Accessing elements in a Ruby array.
Get a sorted list of Group members matching a condition:
sorted_items_by_battery_level = gBattery.members
                                        .select(&:state?) # only include non NULL / UNDEF members
                                        .select { |item| item.state < 20 } # select only those with low battery
                                        .sort_by(&:state)
Get a list of values mapped from the members of a group:
battery_levels = gBattery.select(&:state?) # only include non NULL / UNDEF members
                         .sort_by(&:state)
                         .map { |item| "#{item.label}: #{item.state}" } # Use item state default formatting
Perform arithmetic on values from members of a group:
weekly_rainfall = gRainWeeklyForecast.members.sum(&:state)
Commands
These three variants do the same thing:
My_Item.on
My_Item.command ON
My_Item << ON
Note: all possible commands are supported on the corresponding item types, e.g. on, off, up, down, play, pause, stop, etc.
For more details, see the individual item classes under OpenHAB::Core::Items.
Sending Commands to an Item Only When Its State is Different
My_Item.ensure.on
My_Item.ensure.command ON
My_Item.ensure << ON

# ensure causes the command to return nil if the item is already in the same state
logger.info("Turning off the light") if My_Item.ensure.off
See ensure_states, ensure_states!, ensure.
Timed Commands
A Timed Command is similar to the openHAB Item's expire parameter but it offers more flexibility. It removes the need to manually create a timer. The command is sent to the item, then after the duration has elapsed, reverted. It also handles automatically canceling the timer if the item changes states before it reverts.
My_Switch.on for: 5.minutes
Updates
Post an update to an item:
My_Switch.update ON
State
The Item's state is accessible through Item#state:
if My_Item.state == ON
  # do something
end

# This syntax is equivalent and preferred:
if My_Item.on?
  # do something
end

if Indoor_Temperature.state > 20 | '°C' || Indoor_Temperature.state > Outdoor_Temperature.state
  # do something
end
Note: Boolean helper methods are available depending on the item / state type.
For example up?, down?, closed?, open?, etc.
Check if an Item's state is NULL of UNDEF:
if My_Item.state?
  logger.info 'My_Item is not NULL nor UNDEF'
end
Comparing Item's State
String_Item.state == 'test string'
Number_Item.state > 5.3
items['Number_Item'].state == 10

# Compare Quantity Types
Temperature_Item.state > 24 | '°C'
Indoor_Temperature.state > Outdoor_Temperature.state
Indoor_Temperature.state > Outdoor_Temperature.state + 5 | '°C'
Indoor_Temperature.state - Outdoor_Temperature.state > 5 | '°C'
See unit block
Range checking
Types that are comparable, such as StringType, DateTimeType, DecimalType, PercentType, include Ruby's Comparable module which provides the handy between? method.
String_Item.update("Freddy")
String_Item.state.between?("E", "G") # => true

Number_Item.update(10)
if Number_Item.state.between?(5, 20)
  logger.info "Number_Item falls within the expected range"
end

Temperature_Item.update(16 | "°C")
Temperature_Item.state.between?(20 | "°C", 24 | "°C") # => false
Alternatively, a Ruby range can be used.
This can be handy for excluding the end of the range with the ... operator.
if (5..10).cover?(Number_Item.state)
  logger.info "Number_Item is in the expected range"
end

((20|"°C")..(24|"°C")).cover?(Temperature_Item.state)
Loose Type Comparisons
Some openHAB item types can accept different command types. For example, a DimmerItem can accept a command with an OnOffType, IncreaseDecreaseType or a PercentType. However, ultimately an item only stores its state in its native type, e.g. a DimmerItems's native type is PercentType. In some contexts, you don't care about the precise value of a particular state, and just want to know if it fits the general definition of ON, etc. You can either explicitly convert to the general type, or all of the state predicate methods available on Item, ItemStateEvent, ItemStateChangedEvent, ItemCommandEvent, as well as specific types such as PercentType and HSBType, will do the conversion internally.
DimmerItem1.update(10)
sleep 1
DimmerItem1.state == 10 # => true
DimmerItem1.state == ON # => false
DimmerItem1.state.as(OnOffType) == ON # => true
DimmerItem1.state.on? # => true
DimmerItem1.on? # => true
DimmerItem1.off? # => false

rule 'command' do
  received_command DimmerItem1
  run do |event|
    if event.on?
      # This will be executed even when the command is a positive PercentType
      # instead of an actual ON command
      logger.info("DimmerItem1 is being turned on")
    end
  end
end

DimmerItem1 << 100 # => This will trigger the logger.info above
Metadata
Metadata is accessed through Item#metadata.
metadata = My_Item.metadata['namespace'].value
Persistence
Persistence methods are available directly on Items.
logger.info("KitchenDimmer average_since #{KitchenDimmer.average_since(1.day.ago)}")
daily_max = My_Item.maximum_since(24.hours.ago)
Semantic Model
Many helper methods are available to make it easy to navigate the semantic model to get related items.
LivingRoom_Motion.location                            # Location of the motion sensor
                 .equipments(Semantics::Lightbulb)    # Get all Lightbulb Equipments in the location
                 .members                             # Get all the member items of the equipments
                 .points(Semantics::Switch)           # Select only items that are Switch Points
                 .on                                  # Send an ON command to the items
Linked Things
If an Item is linked to a Thing, you can easily retrieve it.
linked_thing = My_Item.thing
thing_uid = My_Item.thing.uid
An item can be linked to multiple things:
My_Item.things.each do |thing|
  logger.info("Thing: #{thing.uid}")
end
Item Builder
New items can be created via items.build. Note that by default items are not persisted to storage, and will be removed when the script unloads.
items.build do
  switch_item MySwitch, "My Switch"
  switch_item NotAutoupdating, autoupdate: false, channel: "mqtt:topic:1#light"
  group_item MyGroup do
    contact_item ItemInGroup, channel: "binding:thing#channel"
  end
  # passing `thing` to a group item will automatically use it as the base
  # for item channels
  group_item Equipment, tags: Semantics::HVAC, thing: "binding:thing"
    string_item Mode, tags: Semantics::Control, channel: "mode"
  end

  # dimension Temperature inferred
  number_item OutdoorTemp, format: "%.1f %unit%", unit: "°F"

  # unit lx, dimension Illuminance, format "%s %unit%" inferred
  number_item OutdoorBrightness, state: 10_000 | "lx"
end
Things
The things object allows interactions with openHAB things.
Get Thing Status:
things['lgwebos:WebOSTV:main-tv'].status
Check if Thing is Online:
things['lgwebos:WebOSTV:main-tv'].online?
or
things['lgwebos:WebOSTV:main-tv'].status == ThingStatus::ONLINE
Enable/Disable a Thing:
thing = things['lgwebos:WebOSTV:main-tv']

thing.disable
logger.info "TV enabled: #{thing.enabled?}"

thing.enable
logger.info "TV enabled: #{thing.enabled?}"
Get Thing's configurations:
server = things["smtp:mail:local"].configuration["hostname"]
logger.info "Configured SMTP Server: #{server}"

frontporch_cam_ip = things["ipcamera:dahua:frontporch"].configuration["ipAddress"]
logger.info "Front Porch Camera's IP Address: #{frontporch_cam_ip}"
Get Thing's property:
model_id = things["fronius:meter:mybridge:mymeter"].properties["modelId"]
logger.info "Fronius Smart Meter model: #{model_id}"
Thing Builder
New Things can be created via things.build.
thing_config = {
  availabilityTopic: "my-switch/status",
  payloadAvailable: "online",
  payloadNotAvailable: "offline"
}
things.build do
  # Use an existing bridge "mqtt:broker:mosquitto"
  thing "mqtt:topic:my-switch", "My Switch", bridge: "mqtt:broker:mosquitto", config: thing_config do
    channel "switch1", "switch", config: {
      stateTopic: "stat/my-switch/switch1/state", commandTopic: "cmnd/my-switch/switch1/command"
    }
    channel "button1", "string", config: {
      stateTopic: "stat/my-switch/button1/state", commandTopic: "cmnd/my-switch/button1/command"
    }
  end
end
Actions
openHAB built-in actions are available as children of the Actions module. Action classes are also imported into the top-level namespace. Thing actions can be called directly on the Thing.
Publish an MQTT Message:
things['mqtt:broker:mybroker'].publish_mqtt('topic/name', 'payload')
Send an Email:
things['mail:smtp:mymailthing'].send_mail('me@example.com', 'Subject', 'message body')
Play Sound Through the Default Audio Sink:
Audio.play_sound 'sound_file.mp3'
Execute a Command:
Exec.execute_command_line('/path/to/program')
Logging
The JRuby Scripting addon has a global logger object for logging.
To log a message on INFO log level:
logger.info("The current time is #{Time.now}")
The main logger prefix is org.openhab.automation.jrubyscripting.
The default logger name for UI rules includes the rule ID: org.openhab.automation.jrubyscripting.script.<RULE_ID>.
The logger name for file-based rules includes the rule's filename and the rule ID: org.openhab.automation.jrubyscripting.<filename>.rule.<RULE_ID>.
To use a custom logger name:
logger = OpenHAB::Log.logger("org.openhab.custom")
Please be aware that messages might not appear in the logs if the logger name does not start with org.openhab.
This behavior is due to log4j2 requiring definition for each logger prefix.
The logger is similar to a standard Ruby Logger. Supported logging functions include:
logger.log(severity, obj)logger.info(obj)logger.warn(obj)logger.error(obj)logger.debug(obj)logger.trace(obj)
obj is any Ruby (or Java) object.
#to_s (or toString() if it's a Java object) is called on obj, and the result is output to the openHAB log.
Additionally, all of these methods can take a Ruby block instead, which will only be called if logging is enabled at the given level, and the result of the block will be treated as the log message.
Timers
sleep 1.5 # sleep for 1.5 seconds
See Ruby docs on sleep.
sleep should be avoided if possible.
A delay can be inserted in between two execution blocks to achieve the same result.
This delay is implemented with a timer.
This is available only on file-based rules.
rule "delay something" do
  on_load
  run { logger.info "This will run immediately" }
  delay 10.seconds
  run { logger.info "This will run 10 seconds after" }
end
Alternatively a timer can be used in either a file-based rule or in a UI based rule using after.
After takes a Duration relative to now, e.g. 10.minutes, or an absolute time with ZonedDateTime or Time.
rule "simple timer" do
  changed Watering_System, to: ON
  run do
    after(5.minutes) { Watering_System.off }
  end
end
When a script is unloaded, all created timers are automatically cancelled.
Accessing Variables
You can access all variables of the current context in the created timers.
Note: Variables can be mutated (changed) after the timer has been created. Be aware that this can lead to unintentional side effects, e.g. when you change the variable after timer creation, which can make debugging quite difficult!
my_var = "Hello world!";

# Schedule a timer that expires in ten seconds
after(10.seconds) do
  logger.info("Timer expired with my_var = '#{my_var}'")
end

my_var = "Hello mutation!" # When the timer runs, it will log "Hello mutation!" instead of "Hello world!"
Reschedule a Timer
A timer can be rescheduled inside the timer body
after(3.minutes) do |timer|
  My_Light.on
  timer.reschedule # This will reschedule it for the same initial duration, i.e. 3 minutes in this case
end
Or it can be rescheduled from outside the timer
my_timer = after(3.minutes) do
  My_Light.on
end

my_timer.reschedule # Use the same initial duration
It can be rescheduled to a different duration
after(3.minutes) do |timer|
  My_Light.on
  timer.reschedule(1.minute)
end
It can also be canceled:
rule 'cancel timer' do
  changed Light_Item, to: OFF
  run { my_timer&.cancel }
end
Manage Multiple Timers
Multiple timers can be managed in the traditional way by storing the timer objects in a Hash:
@timers ||= {}

if @timers[event.item]
  @timers[event.item].reschedule
else
  @timers[event.item] = after 3.minutes do # Use the triggering item as the timer ID
    event.item.off
    @timers.delete(event.item)
  end
end
However, a built in mechanism is available to help manage multiple timers, and is done in a thread-safe manner. This is done using timer IDs. The following rule automatically finds and reschedules the timer matching the same ID, which corresponds to each group member.
after 3.minutes, id: event.item do # Use the triggering item as the timer ID
  event.item.off
end
Furthermore, you can manipulate the managed timers using the built-in timers object.
# timers is a special object to access the timers created with an id
rule "cancel all timers" do
  received_command Cancel_All_Timers, command: ON # Send a command to this item to cancel all timers
  run do
    gOutdoorLights.members.each do |item_as_timer_id|
      timers.cancel(item_as_timer_id)
    end
  end
end

rule "reschedule all timers" do
  received_command Reschedule_All_Timers, command: ON # Send a command to this item to restart all timers
  run do
    gOutdoorLights.members.each do |item_as_timer_id|
      timers.reschedule(item_as_timer_id)
    end
  end
end
Cache
The shared_cache object provides a cache that can be used to set and retrieve objects that will be persisted between reloads of scripts, and available between different rules. It acts similarly to a regular Ruby Hash. Just be wary of Ruby-only data types (such as Symbols) that won't be accessible between different scripts.
Get a previously set object with a default value:
shared_cache.compute_if_absent(:counter) { 0 } # Initialize with 0 if it didn't exist
logger.info("Count: #{shared_cache[:counter] += 1}")
Get a previously set object, or assign it (this version is subject to race conditions with other scripts):
shared_cache[:counter] ||= 0
logger.info("Count: #{shared_cache[:counter] += 1}")
Get a previously set object with a default value, without assigning it (this version has an even longer amount of time between fetching the value and assigning it):
count = shared_cache.fetch(:counter) { 0 }
shared_cache[:counter] = count + 1
Time
Several options are available for time related code, including but not limited to:
- Java LocalDate - represents a date with no time
- Java LocalTime - represents a time with no date
- Java Month
- Java MonthDay - represents a date with no time or year
- Java ZonedDateTime - represents a specific instance with a date and time
- Java Duration
- Java Period
- Ruby Date - represents a date with no time
- Ruby Time - represents a specific instant with a date and time
- Ruby DateTime - represents a specific instant with a date and time
Durations
Ruby integers and floats are extended with several methods to support durations. These methods create a new Duration or Period object that is used by the every trigger, delay block, the for option of changed triggers, and timers.
rule "run every 30 seconds" do
  every 30.seconds
  run { logger.info("Hello") }
end
rule "Warn about open door" do
  changed FrontDoor, to: OPEN, for: 10.minutes
  run { |event| logger.info("#{event.item.name} has been open for 10 minutes") }
end
rule "Timer example" do
  on_load
  run do
    after(3.hours) { logger.info("3 hours have passed") }
  end
end
Time Comparisons, Conversions, and Arithmetic
Comparisons, conversions and arithmetic are automatic between Java and Ruby types. Note that anytime you do a comparison between a type with more specific data, and a type missing specific data, the comparison is done as if the more specific data is at the beginning of its period. I.e. comparing a time to a month, the month will be treated as 00:00:00 on the first day of the month. When comparing with a type that's missing more generic data, it will be filled in from the other object. I.e. comparing a time to a month, the month will be assumed to be in the same year as the time.
# Get current date/time
now = ZonedDateTime.now
one_hour_from_now = ZonedDateTime.now + 60.minutes
one_hour_from_now = 1.hour.from_now # or use the simpler helper method that also returns a ZonedDateTime
# Or use Ruby time
ruby_now = Time.now

# Compare them
if one_hour_from_now > now
  logger.info "As it should be"
end

# Comparing Ruby Time and ZonedDateTime works just fine
if one_hour_from_now > ruby_now
  logger.info "It works too"
end

if Time.now > LocalTime.parse('7am')
  logger.info 'Wake up!'
end

if MonthDay.now == MonthDay.parse('02-14')
  logger.info "Happy Valentine's Day!"
end

# Ranges can cross midnight
if Time.now.between?('10pm'..'5am')
  logger.info 'Sleep time'
end

# Explicit conversions
ZonedDateTime.now.to_time
Time.now.to_zoned_date_time

# You can parse string as time
wake_up_time = LocalTime.parse("6:00 am")

# Compare now against LocalTime
if ZonedDateTime.now >= wake_up_time
  Wake_Up_Alarm.on
end

# Even compare against Ruby Time
if Time.now >= wake_up_time
  Wake_Up_Alarm.on
end

# Get today's start of the day (midnight)
start_of_day = ZonedDateTime.now.with(LocalTime::MIDNIGHT)
# or
start_of_day = LocalTime::MIDNIGHT.to_zoned_date_time
# or
start_of_day = LocalDate.now.to_zoned_date_time
# or using Ruby Date
start_of_day = Date.today.to_zoned_date_time

# Comparing ZonedDateTime against LocalTime with `<`
max = Solar_Power.maximum_since(24.hours.ago)
if max.timestamp < LocalTime::NOON
  logger.info "Max solar power #{max} happened before noon, at: #{max.timestamp}"
end

# Comparing Time against ZonedDateTime with `>`
sunset = things["astro:sun:home"].get_event_time("SUN_SET", nil, nil)
if Time.now > sunset
  logger.info "it is after sunset"
end

# Subtracting Duration from Time and comparing Time against ZonedDateTime
Motion_Sensor.last_update < Time.now - 10.minutes
# Alternatively:
Motion_Sensor.last_update < 10.minutes.ago

# Finding The Duration Between Two Times
elapsed_time = Time.now - Motion_Sensor.last_update
# Alternatively:
elapsed_time = ZonedDateTime.now - Motion_Sensor.last_update

# Using `-` operator with ZonedDateTime
# Comparing two ZonedDateTime using `<`
Motion_Sensor.last_update < Light_Item.last_update - 10.minutes
# is the same as:
Motion_Sensor.last_update.before?(Light_Item.last_update.minus_minutes(10))

# Getting Epoch Second
Time.now.to_i
ZonedDateTime.now.to_i
ZonedDateTime.now.to_epoch_second

# Convert Epoch second to time
Time.at(1669684403)

# Convert Epoch second to ZonedDateTime
Time.at(1669684403).to_zoned_date_time
# or
Instant.of_epoch_second(1669684403).at_zone(ZoneId.system_default)
Time-based QuantityType
QuantityType objects with time dimension work like a Duration in arithmetic operations. They can be compared, added, and subtracted against Duration objects, and added/subtracted from Ruby and Java Date/Time-like objects.
Number:Time Pump_Total_Runtime "Total Pump runtime today"
if Pump_Total_Runtime.state >= 8.hours
  logger.info "The Pump has been running for 8 hours or more today"
end
Ranges
Ranges of date time objects work as expected.
Make sure to use #cover? instead of #include? to do a simple comparison, instead of generating an array and searching it linearly.
Ranges of non-absolute, "circular" types (LocalTime, Month, MonthDay) are smart enough to automatically handle boundary issues.
Coarse types (like LocalDate, Month, MonthDay) will also work correctly when checking against a more specific type.
To easily parse strings into date-time ranges, use the OpenHAB::DSL.between helper.
Duration, ZonedDateTime, LocalTime, LocalDate, MonthDay, Month, Time, Date, and DateTime classes include between? method that accepts a range of string or any of the date/time objects.
between("10:00".."14:00").cover?(Time.now)
between("11pm".."1am").cover?(Time.now)

# Or use the alternative syntax:
Time.now.between?("10:00".."14:00")
Time.now.between?("11pm".."1am")

case Time.now
when between("6:00"..."12:00")
  logger.info("Morning Time")
when between('12:00'..'15:00')
  logger.info("Afternoon")
else
  logger.info("Not in time range")
end

# Compare against Month
Time.now.between?(Month::NOVEMBER..Month::DECEMBER)
Date.today.between?(Month::NOVEMBER..Month::DECEMBER)
ZonedDateTime.now.between?(Month::NOVEMBER..Month::DECEMBER)

# Compare against MonthDay
Time.now.between?("05-01".."12-01")

# Compare against time of day
Time.now.between?("5am".."11pm")
Proximity Checks
The within? method allows you to check if a date/time object is within a specific distance (epsilon) of an anchor time. By default, this anchor time is now.
This is highly useful for checking if a sensor update is fresh or if an event occurred near a specific deadline.
time_object.within?(epsilon, of: ZonedDateTime.now)
Example
Check a sensor's last update timestamp when a different event occurs:
rule 'Welcome home light' do
  changed Front_Door, to: OPEN
  run do
    # Evaluates if the hallway motion sensor was updated in the last 5 minutes.
    # If not, assume someone is arriving from the outside and turn on the light.
    Hallway_Light.on unless Hallway_Motion.last_state_change.within?(5.minutes)
  end
end
Ephemeris
Helper methods to easily access openHAB's Ephemeris action are provided on all date-like objects:
Time.now.holiday? # => false
MonthDay.parse("12-25").holiday # => :christmas
1.day.from_now.next_holiday # => :thanksgiving
Notification.send("It's #{Ephemeris.holiday_name(Date.today)}!") if Date.today.holiday?

Date.today.weekend? # => true
Date.today.in_dayset?(:school) # => false
Rules, Scripts, and Scenes
Rules, Scenes and Scripts can be accessed using the rules object. For example, to execute/trigger a rule:
rules[rule_uid].trigger
Scenes are rules with a Scene tag, and Scripts are rules with a Script tag.
They can be found using their uid just like normal rules, i.e. rules[uid].
For convenience, a list of all Scenes are available through the enumerable rules.scenes, and a list of all Scripts through rules.scripts.
Example: All scenes tagged sunrise will be triggered at sunrise, and all scenes tagged sunset will be triggered at sunset.
Note: these use the Terse Rule syntax.
channel("astro:sun:home:rise#event") { rules.scenes.tagged("sunrise").each(&:trigger) }
channel("astro:sun:home:set#event") { rules.scenes.tagged("sunset").each(&:trigger) }
Or it can be written as one rule with the help of trigger attachments.
rule "Activate scenes at sunset/sunrise" do
  channel "astro:sun:home:rise#event", attach: "sunrise"
  channel "astro:sun:home:set#event", attach: "sunset"
  run { |event| rules.scenes.tagged(event.attachment).each(&:trigger) }
end
Get the UID of a Rule
rule_obj = rule 'my rule name' do
  received_command My_Item
  run do
    # rule code here
  end
end

rule_uid = rule_obj.uid
A rule's UID can also be specified at rule creation
rule "my rule name", id: "my_unique_rule_uid" do
  # ...
end

# or
rule "my rule name" do
  uid "my_unique_rule_uid"
  # ...
end
Get the UID of a Rule by Name
rule_uid = rules.find { |rule| rule.name == 'This is the name of my rule' }.uid
Enable or Disable a Rule by UID
rules[rule_uid].enable
rules[rule_uid].disable
Passing Values to Rules
A rule/script may be given additional context/data by the caller. This additional data is available within the rule by referring to the names of the context variable. This is applicable to both UI rules and file-based rules.
Within the script/rule body (either UI or file rule)
script id: "check_temp" do
  if CPU_Temperature.state > maxTemperature
    logger.warn "The CPU is overheating!"
  end
end
The above script can be executed, passing it the maxTemperature argument from any supported scripting language, e.g.:
rules["check_temp"].trigger(maxTemperature: 80 | "°C")
Gems with Inline Bundler
Bundler is integrated, enabling any Ruby gem compatible with JRuby to be used within rules. This permits easy access to the vast ecosystem of libraries within the Ruby community. Gems are available using the inline bundler syntax. The require statement can be omitted.
gemfile do
  source 'https://rubygems.org'
  gem 'json', require: false
  gem 'nap', '1.1.0', require: 'rest'
end

logger.info("The nap gem is at version #{REST::VERSION}")
Shared Code
If you would like to easily share code among multiple scripts, you can place it in <OPENHAB_CONF>/automation/ruby/lib.
You can then simply require the file from your rules files.
Files located in $RUBYLIB won't be automatically loaded individually by openHAB, only when you require them.
automation/ruby/myrule.rb OR a UI Rule's script:
require "my_lib"

logger.info(my_lib_version)
automation/ruby/lib/my_lib.rb
def my_lib_version
  "1.0"
end
Transformations
Using openHAB Transformations
Existing openHAB transformations can also be used by calling the transform method.
This enables the use of any transformations from the /transform folder or managed through the UI, such as MAP, JSONPATH, Jinja Transformation, etc.
# Convert OPEN/CLOSED to Online/Offline using availability.map
# OPEN=Online
# CLOSED=OFFLINE
logger.info transform(:map, "availability.map", LivingRoom_Switch_Availability.state)
Writing Custom Transformations in Ruby
This add-on also provides the necessary infrastructure to use Ruby for writing transformations.
The main value to be transformed is given to the script in a variable called input.
Note that the values are passed to the transformation as Strings even for numeric items and data types.
File Based Transformations
Once the addon is installed, you can create a Ruby file in the $OPENHAB_CONF/transform directory, with the extension .rb.
When referencing the file, you need to specify the RB transform: RB(mytransform.rb):%s.
You can also specify additional variables to be set in the script using a URI-like query syntax: RB(mytransform.rb?a=1&b=c):%s in order to share a single script with slightly different parameters for different items.
Example: Display the wind direction in degrees and cardinal direction
weather.items
Number:Angle Exterior_WindDirection "Wind Direction [RB(compass.rb):%s]" <wind>
compass.rb
DIRECTIONS = %w[N NE E SE S SW W NW N].freeze

if input.nil? || input == "NULL" || input == "UNDEF"
  "-"
else
  cardinal = DIRECTIONS[(input.to_f / 45).round]
  "#{cardinal} (#{input.to_f.round}°)"
end
Given a state of 82 °, this will produce a formatted state of E (82°).
Example: Display the number of lights that are on/off within a group
Group gIndoorLights "Indoor Lights [RB(group_count.rb?group=gIndoorLights):%s]"
Group gOutdoorLights "Outdoor Lights [RB(group_count.rb?group=gOutdoorLights):%s]"
group_count.rb
items[group].all_members.then { |all| "#{all.select(&:on?).size}/#{all.size}" }
When 3 lights out of 10 lights are on, this will produce a formatted state of 3/10
Inline Transformations
Inline transformations are supported too. For example, to display the temperature in both °C and °F:
Number:Temperature Outside_Temperature "Outside Temperature [RB(| input.to_f.|('°C').then { |t| %(#{t.format('%d °C')} / #{t.to_unit('°F').format('%d °F')}) } ):%s]"
When the item contains 0 °C, this will produce a formatted state of 0 °C / 32 °F.
Profile
You can create an openHAB profile in JRuby that can be applied to item channel links. For more details, see #profile.
Sitemaps
Sitemaps can be created via sitemaps.build.
sitemaps.build do
  sitemap "default", "My Residence" do
    frame label: "Control" do
      text label: "Climate", icon: "if:mdi:home-thermometer-outline" do
        frame label: "Main Floor" do
          text item: MainFloor_AmbTemp
          switch item: MainFloorThermostat_TargetMode, label: "Mode", mappings: %w[off auto cool heat]
          setpoint item: MainFloorThermostat_SetPoint, label: "Set Point", visibility: "MainFloorThermostat_TargetMode!=off"
        end
        frame label: "Basement" do
          text item: Basement_AmbTemp
          switch item: BasementThermostat_TargetMode, label: "Mode", mappings: { OFF: "off", COOL: "cool", HEAT: "heat" }
          setpoint item: BasementThermostat_SetPoint, label: "Set Point", visibility: "BasementThermostat_TargetMode!=off"
        end
      end
    end
  end
end
File Based Rules
Basic Rule Structure
See OpenHAB::DSL::Rules::Builder for full details.
rule "name" do
  <one or more triggers>
  <one or more execution blocks>
  <zero or more guards or conditions>
end
Jump to: Rule Triggers, Rule Executions, Rule Conditions
Rule Triggers
Item or Thing Changed
rule "Log (or notify) when the secret door is open" do
  changed SecretDoor, to: OPEN
  run { |event| logger.info("#{event.item} is opened") }
end
rule "Log when Fronius Inverter goes offline" do
  changed things["fronius:bridge:mybridge"], from: :online, to: :offline
  run { |event| logger.info("Thing #{event.uid} went #{event.status}!") }
end
See #changed
Detecting Change Duration
Only execute a rule when an item state changed and stayed the same for a period of time. This method can only be done using a file-based rule.
rule "Garage Door Alert" do
  changed GarageDoor, to: OPEN, for: 20.minutes
  run { Voice.say "The garage door has been open for 20 minutes!" }
end
Item Updated
rule "Calculate" do
  updated Camera_Event_Data
  run do |event|
    logger.info "Camera event: #{event.state}"
  end
end
See #updated
Item Received a Command
rule "Received a command" do
  received_command DoorBell, command: ON
  run do |event|
    Notification.send "Someone pressed the door bell"
    play_sound "doorbell.mp3"
  end
end
Member-of-Group Trigger
Add .members to the GroupItem in order to trigger on its members.
rule "Trigger by Member of" do
  changed gGroupName.members
  run do |event|
    logger.info "Triggered item: #{event.item.name}"
  end
end
Script is Loaded
rule "initialize things" do
  on_load # This triggers whenever the script (re)loads
  run { logger.info "Here we go!" }
end
See #on_load
openHAB System Started
rule "System startup rule" do
  on_start at_level: 80
  run { logger.info "I'm glad to be alive!" }
end
See #on_start
Cron Trigger
Traditional cron trigger:
rule "cron rule" do
  cron "0 0,15 15-19 L * ?""
  run { logger.info "Cron run" }
end
Or an easier syntax:
rule "cron rule" do
  cron second: 0, minute: "0,15", hour: "15-19", dom: "L"
  run { logger.info "Cron run" }
end
See #cron
every Trigger
rule "run every day" do
  every :day, at: "2:35pm"
  run { Amazon_Echo_TTS << "It's time to pick up the kids!" }
end
rule "run every 5 mins" do
  every 5.minutes
  run { logger.info "openHAB is awesome" }
end
rule "Anniversary Reminder" do
  every "10-15" # This takes a MM-DD syntax to trigger on 15th of October at midnight
  run do
    things["mail:smtp:mymailthing"].send_mail("me@example.com", "Anniversary Reminder!", "Today is your anniversary!")
  end
end
See #every
DateTimeItem Trigger
To trigger based on the date and time stored in a DateTime item, use at ItemName:
rule "DateTime Trigger" do
  at My_DateTimeItem
  run do |event|
    logger.info "Triggered by #{event.item} at #{event.item.state}"
  end
end
To trigger based on only the time part of a DateTime item, use every :day, at: ItemName:
rule "TimeOnly Trigger" do
  every :day, at: My_DateTimeItem
  run do |event|
    logger.info "Triggered by #{event.item} at #{event.item.state}"
  end
end
File and Directory Change Trigger
To trigger a rule when a file or directory was created, modified, or deleted, use watch path.
rule "Send notification when a new image was created" do
  watch OpenHAB::Core.config_folder / "html/snapshots/*.jpg", for: :created
  run do |event|
    Snapshot_Image_Item.update_from_file(event.path)
    Notification.send "A new snapshot was created!", title: "New Snapshot!", attachment: Snapshot_Image_Item
  end
end
Other Triggers
There are more triggers supported by this library. See the full list of supported triggers.
Combining Multiple Triggers
rule "multiple triggers" do
  changed Switch1, to: ON
  changed Switch2, to: ON
  run { |event| logger.info "Switch: #{event.item.name} changed to: #{event.state}" }
end
When the trigger conditions are the same, the triggers can be combined.
rule "multiple triggers" do
  changed Switch1, Switch2, to: ON
  run { |event| logger.info "Switch: #{event.item.name} changed to: #{event.state}" }
end
Combining Multiple Conditions
rule "multiple conditions" do
  changed Button_Action, to: ["single", "double"]
  run { |event| logger.info "Action: #{event.state}" }
end
Rule Conditions
rule "motion sensor" do
  updated Motion_Sensor, to: ON
  only_if { Sensor_Enable.on? } # Run rule only if Sensor_Enable item is ON
  not_if { Sun_Elevation.positive? } # and not while the sun is up
  run { LightItem.on }
end
Restrict Rule Executions to Certain Time of Day:
rule "doorbell" do
  updated DoorBell_Button, to: "single"
  between "6am".."8:30pm"
  run { play_sound "doorbell_chime.mp3" }
end
See Rule Guards
Rule Executions
Execution blocks are executed when a rule is triggered and all the rule conditions are met. Multiple execution blocks can be specified. This can be useful especially when using a delay execution block inbetween two run or triggered blocks.
Run Execution Block
A run execution block is the most commonly used execution block. It provides the full event object to the block.
rule "Rule with a run block" do
  received_command SwitchItem1
  run do |event|
    logger.info "#{event.item} received this command: #{event.command}"
  end
end
Triggered Execution Block
A triggered execution block passes the TriggeringItem object directly to the block.
It is handy when combined with Ruby's pretzel-colon operator to act directly on the object.
rule "Limit the duration of TV watching" do
  changed gTVPower.members, to: ON, for: 2.hours
  triggered(&:off)
end
Delay Execution Block
A delay exection block is useful for adding a delay inbetween rule executions or even at the beginning of the trigger event without having to manually create a timer.
Unlike sleep, a delay block does not block the current executing thread.
It actually sets a timer for you behind the scenes.
rule "Check for offline things 15 minutes after openHAB had started" do
  on_start
  delay 15.minutes
  run do
    offline_things = things.select(&:offline?).map(&:uid).join(", ")
    Notification.send("Things that are still offline: #{offline_things}")
  end
end
See Execution Blocks
Terse Rules
A rule with a trigger and an execution block can be created with just one line.
received_command(My_Switch, command: ON) { My_Light.on }
See Terse Rules for full details.
Early Exit From a Rule
You can use next within a file-based rule, because it's in a block:
rule "doorbell" do
  updated DoorBell_Button, to: "single"
  run do
    next unless Time.now.between?("6am".."8:30pm")

    play_sound "doorbell_chime.mp3"
  end
end
Use return within a UI rule:
return unless Time.now.between?("6am".."8:30pm")

play_sound "doorbell_chime.mp3"
Dynamic Generation of Rules
The rule definition itself is just Ruby code, which means you can use code to generate your rules. Take care when doing this as the the items/groups are processed when the rules file is processed, meaning that new items/groups will not automatically generate new rules.
rule "Log whenever a Virtual Switch Changes" do
  items.grep(SwitchItem)
       .select { |item| item.label&.include?("Virtual") }
       .each do |item|
         changed item
       end

  run { |event| logger.info "#{event.item.name} changed from #{event.was} to #{event.state}" }
end
This rule is effectively the same:
virtual_switches = items.grep(SwitchItem)
                        .select { |item| item.label&.include?("Virtual") }

rule "Log whenever a Virtual Switch Changes 2" do
  changed(*virtual_switches)
  run { |event| logger.info "#{event.item.name} changed from #{event.was} to #{event.state} 2" }
end
This will accomplish the same thing, but create a new rule for each virtual switch:
virtual_switches = items.grep(SwitchItem)
                        .select { |item| item.label&.include?("Virtual") }

virtual_switches.each do |switch|
  rule "Log whenever a #{switch.label} Changes" do
    changed switch
    run { |event| logger.info "#{event.item.name} changed from #{event.was} to #{event.state} 2" }
  end
end
Scenes and Scripts
A scene can be created using the .scene method.
scene "Movie", id: "movie", description: "Set up the theatre for movie watching" do
  Theatre_Window_Blinds.down
  Theatre_Screen_Curtain.up
  Theatre_Mood_Light.on
  Theatre_Light.off
  Theatre_Projector.on
  Theatre_Receiver.on
end
To create a script, use the .script method.
Note that scripts can be executed with additional contexts.
Hooks
File based scripts can also register hooks that will be called when the script has completed loading (script_loaded) and when it gets unloaded (script_unloaded).
x = 1

script_loaded do
  logger.info("script loaded!")
  logger.info(x) # this will log 2, since it won't execute until the entire script loads.
end

x = 2

script_unloaded do
  logger.info("script unloaded")
end
Console Commands
Karaf Console commands are provided for performing maintenance and troubleshooting tasks.
The commands are prefixed with openhab:jrubyscripting or just jrubyscripting followed by the sub-commands listed below:
| Command | Description |
|---|---|
info |
Displays information about JRuby Scripting add-on |
console |
Starts an interactive JRuby REPL console which allows you to interact directly with the current openHAB runtime. |
bundle |
Runs Ruby bundler with your Gemfile as configured with bundle_gemfile setting |
gem |
Runs Ruby gem command to install, upgrade, or uninstall gems that are located in your gem_home |
prune |
Removes gem files and directories from older openhab installations. |
Calling Java From JRuby
JRuby can access almost any Java object that's available in the current JVM. This is how the library is implemented internally.
# you can `java_import` classes and interfaces, which will become Ruby constants
java_import java.time.format.DateTimeFormatter

formatter = DateTimeFormatter.of_pattern("yyyy MM dd")

# or you can just reference them directly to avoid polluting the global namespace
formatter = java.time.format.DateTimeFormatter.of_pattern("yyyy MM dd")
Full Documentation
Visit https://openhab.github.io/openhab-jruby/ for the full documentation of the openHAB JRuby Helper Library.